How to make a landscape view. How to make a book or landscape format in Word
- How to make an album list in Word version 2007 and higher.
- We do landscape orientation for some pages of the document.
- The first way:
- The second way.
- Let's sum up.
- Landscape and portrait page orientation in MS Word
- How to change the orientation of one page in Word?
- How to make only one sheet of landscape orientation
The book format is the most convenient and is used absolutely everywhere, starting directly from books to web pages. He is intuitive and familiar. For this reason, by default, in Microsoft Word it is the portrait orientation that is set. However, if the initial settings have been changed or you need additional conditions for the layout of the document, you need to know how to do it.
In order to create a portrait page format in Microsoft Word, go to the “ Layout ” tab and select “ Portrait ” in the “Page Setup ” section of the “ Orientation ” option. Thus, the whole document will be transformed to you and all pages will be exactly in book format .
Sometimes it happens that it is necessary that in a complex document only certain pages were in book format. And for the rest, use landscape. For this, the described function will not work.
It is necessary to select one or several pages, go back to the “ Layout ” tab and click on the small icon to the right of the section “Page settings ” then after this, in the “ Orientation ” section, select “ Book ” and in the lower item “ Apply :” select " To selected text ". After that, the necessary pages will be presented in the orientation you need.
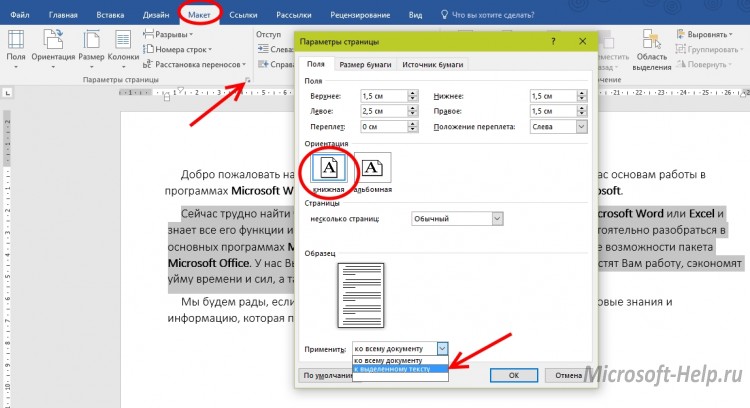
It is worth noting that if you select a whole page, it will completely change its orientation, if you select a separate fragment, it will create new page , which will receive its orientation, and everything before and after will be separated by gaps, as a result of which new pages will be created. However, creating gaps is convenient because it allows you to continue working on the content of individual pages without worrying about the appearance and formatting of the rest.
The above instructions apply to versions of Microsoft Word 2007 and above. To change the orientation of the document in 2003, you must go to " File " -> "Page Settings " -> " Book " -> " OK ". And even in this version of the program, the ability to change the orientation of a separate piece of text is available.
Many users, working in a text editor, often do not know how to make album sheet in Word, that is, change the page orientation from portrait to landscape. Often, this is required when we need to place on one page an inscription, drawing or graphic that does not fit the width of the book sheet. For this, it is necessary to change the orientation of the page to landscape. How to do this you will find in this article. By the way, since not all users keep up with the times and have not updated their MS Office to the latest version, we will consider how to accomplish the task in different releases of MS Word.
To begin with, I propose to consider how to accomplish the task set before us in MS Word 2003, since its interface is very different from subsequent releases. If you have this version of the product, then do the following:
After that, the settings are applied to the entire document.
How to make an album list in Word version 2007 and higher.
If you are a more advanced user and have long had time to update your software package from Microsoft, you probably noticed that the interface of the new versions is quite reworked and has a ribbon menu structure. If you have not had time to get acquainted with all the functions of MS Word, and you certainly need to know how to make a landscape sheet in 2017 and then do the following steps:
After the done actions, all pages of the document will take the form of a landscape sheet.
We do landscape orientation for some pages of the document.
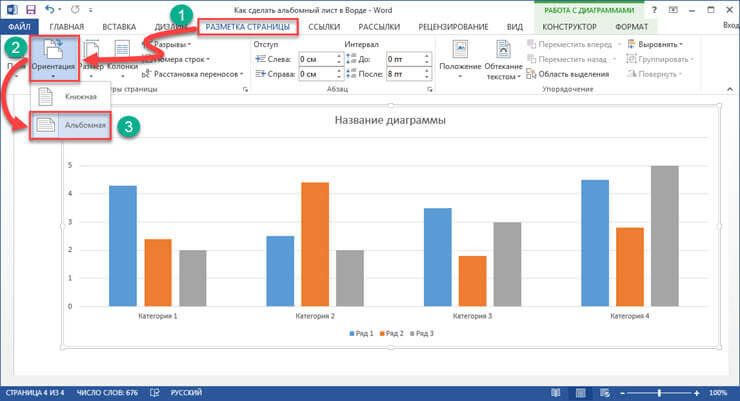
Very often, when writing reports, essays, coursework and theses when placing in the document any figures, graphs or other data that do not fit the width of book sheet , this sheet is required to rotate. If the above we considered the options for how to make a landscape for the whole document, now we will look at how to apply the settings to only one sheet. I suggest to get acquainted with two options settings.
The first way:
After the changes are done, you will see that landscape orientation accepted only selected document pages.
The second way.
The second way to create album pages involves using the “Breaks” function. To implement this method, do the following:
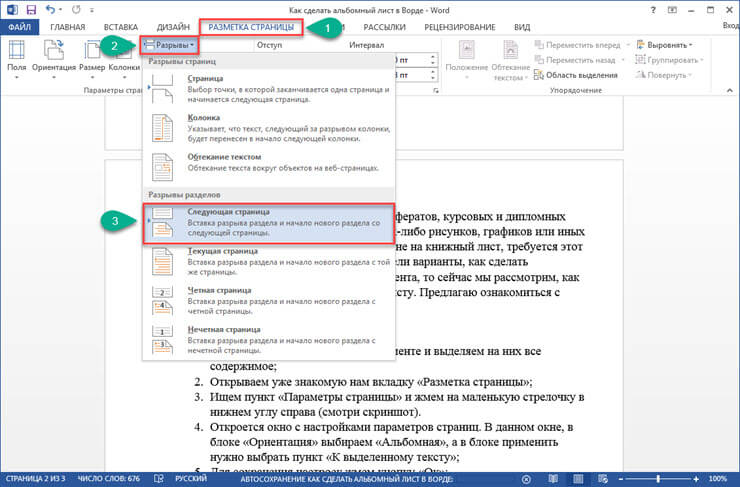
After saving the settings, the specified section will have a landscape page orientation.
Let's sum up.
Today we have examined in detail how to make a landscape list in Word. I hope that this small instruction helped you to get the desired result. And you can easily change the orientation of both individual pages in the document and all of them in the future. I believe that the information in this article will be relevant for many students and schoolchildren who have the goal to write a report, essay or any other work, but are not well acquainted with the functions of a text editor.
Landscape and portrait page orientation in MS Word
By default, the text editor MS Word offers pages in the so-called. "Portrait" orientation, that is, the height of the page is much higher than the width. However, sometimes, for example, when printing on a sheet of large tables, it is much more convenient to use the "landscape" orientation.
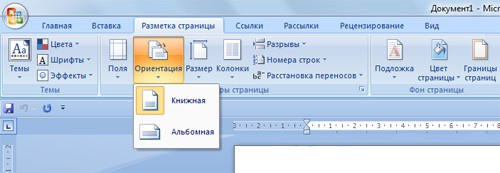
To change the page orientation, go to the Page Layout tab , and in the Page Setup group , use the Orientation tool . It’s impossible to make a mistake as you can see - we have only 2 options. One click on the version you like, and voila, all the pages of our document immediately “turn over” and automatically adjust to the selected position template.
It is very easy to do this and almost any Word user will cope with the task without any preparation. Much more non-trivial, the following task looks like:
How to change the orientation of one page in Word?
As you noticed, when you change the orientation of the page, the whole document “flips” at once. It looks strange to say the least - most likely the very " large table »You have only one, therefore it is not your plan to submit an annual report or a diploma in the form of an album because of it. That is, to change the orientation to the landscape, you need only one or two pages , and everything else, let it go in the usual “book” form. Simply put, we need one Word document place pages with different orientations.
How to be? Some craftsmen are not wisely sly, and simply create “book” and “album” pages of the same document in different files, and then, when printed, “bring” all this into a single document. Of course, this partly solves the problem, but creates a new one - what about the pagination, with “broken” text blocks and uneven layout?
In fact, of course, there is nothing difficult here, and now you will see this with an example.
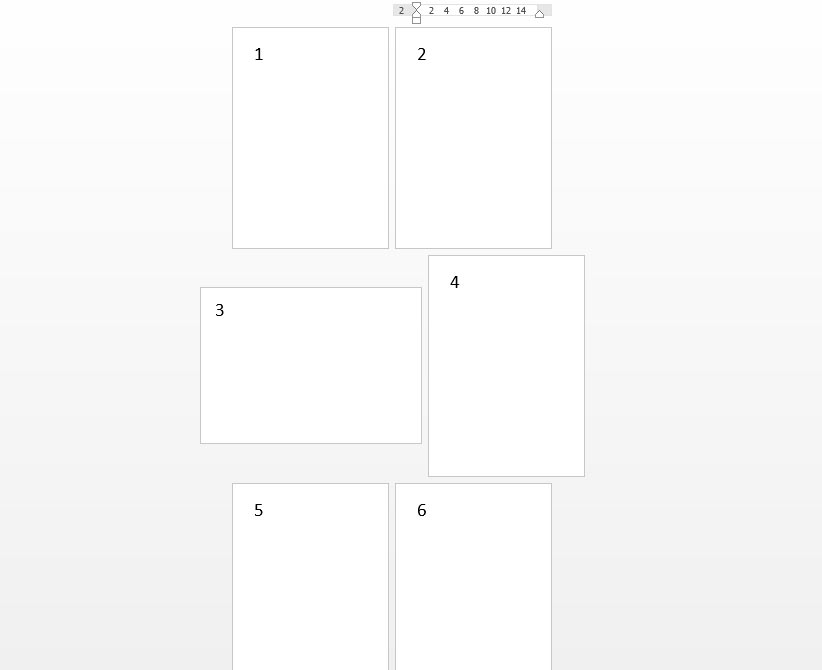
I created 6 empty pages in the Word and am going to change the orientation of one of them to landscape
Suppose there are 6 pages in my document. 5 of them are standard “portrait” ones, but I want to make a landscape orientation one page, for example, the third one.
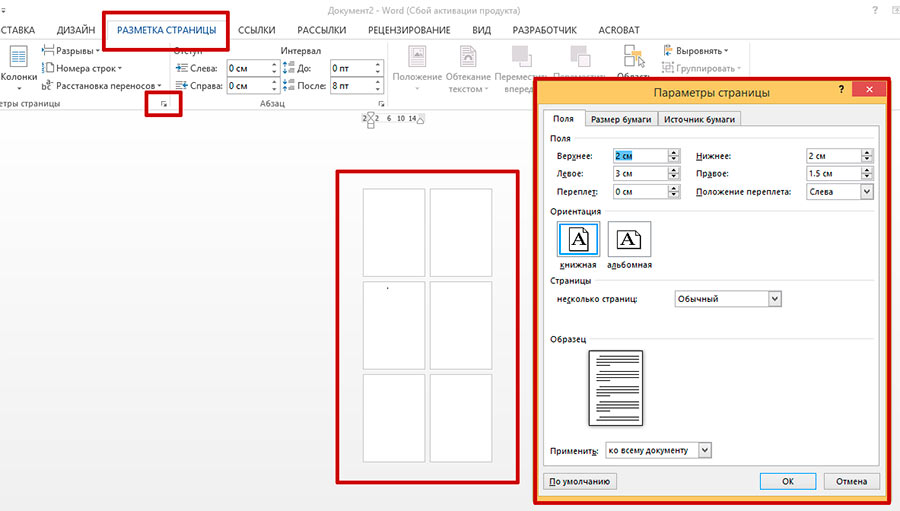
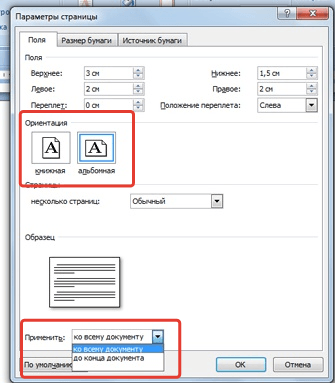
First of all, I put the cursor on the page that goes up to the desired one (i.e., on the 2nd one), and switch to the already familiar “Page Layout” tab, in the “Page Setup” group . Please note - in the lower right corner of the group there is a hidden icon "Page settings" . Click on it and display the window of the same name.
The first tab of this window is called Fields . Look a little lower and you will see the page display formats already familiar to us: “book” (active now) and “album”. We choose the option we need and ... do not rush to click on the "OK" button, but look even lower.
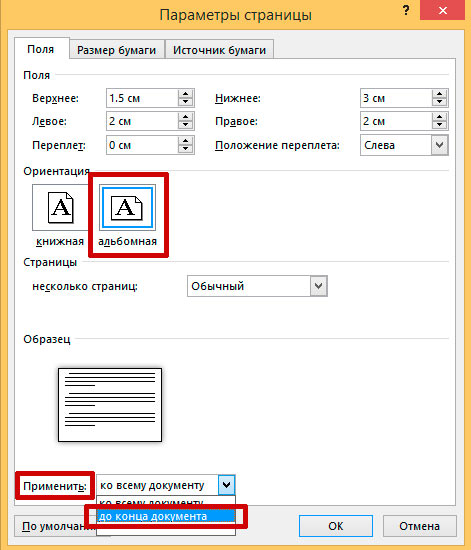
See the inscription: “Apply ... To the whole document ”? Feel free to change this line to “Apply ... Until the end of the document, ” and now click on the coveted “Ok.”

Okay, our document now contains pages of different orientations ... But there is much to move on!
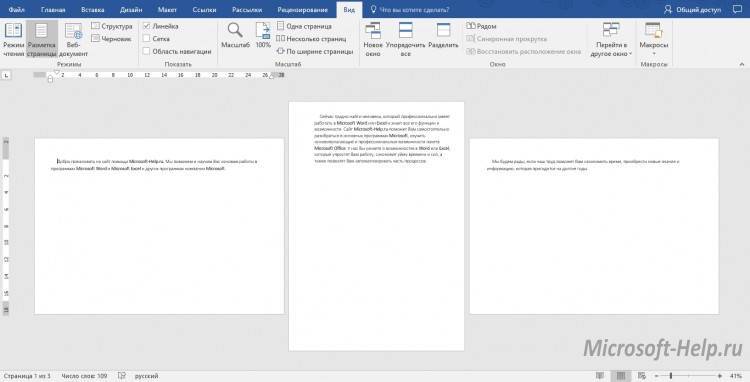
We look what happened. Miracles in sieve! The first two pages remained “book”, but the rest became album. Do not worry - we are on the right track. Left just a little bit.
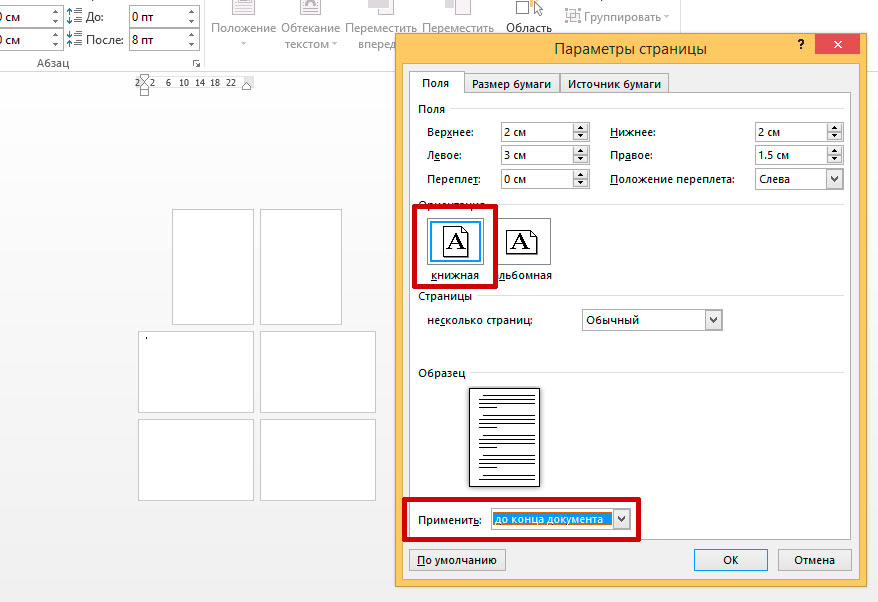
The final touch - expand the "unnecessary" pages in the opposite direction
Put the cursor, now on our “landscape” page (it’s at number three, if you don’t forget), and again open “Page settings”, and change everything back: instead of “landscape” orientation, we put “portrait”, and the item “ Apply ... "leave in the same position as before:" Until the end of the document. " Again, click "OK" and see a completely different picture.
problem solved - we managed to make the pages of our document have different orientation - both book and album
As you can see, the task has been fully accomplished: we managed to change the orientation of one page in MS Word ... Although this task is not one of those whose solution lies on the surface.
You may also be interested in:
To write an answer:
Creating a new document in Microsoft Word, as a rule, opens a worksheet with a portrait (portrait) orientation. This document format is the most optimal, because used in most cases. But there are situations when you need to create a document with a horizontal or, as it is also called, landscape orientation.
Many Microsoft Word users find it difficult for a person to answer the question of how to change the orientation of a document, for example, to insert an image that simply does not fit in portrait orientation.
In fact, changing the orientation is very simple. Go to the “Page Layout” tab and click on the “Orientation” item. The menu for selecting the position of the sheet will open, where you must select the "Landscape" item.
Similarly, the return to normal portrait orientation .
Please note that choosing a landscape orientation, all subsequent sheets will be in that orientation.
How to make only one sheet of landscape orientation
For example, you need to make one sheet in landscape orientation, which will be located in the middle of the document.
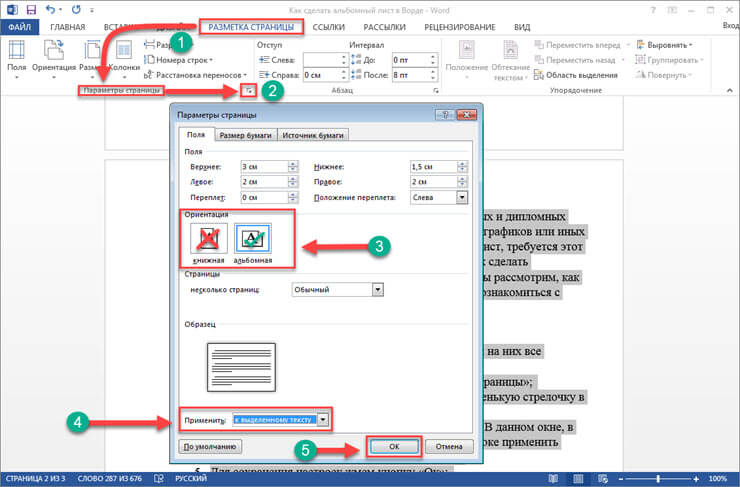
To do this, go to the right page and then open the Page Layout tab. Now you need to select a small icon, as in the screenshot below.

A new window will open in which the page settings are configured. In the "Orientation" section , check "Landscape" . At the bottom of the window, near the "Apply" option, select the "Until the end of the document" option to make landscape orientation for only one sheet. Click OK to apply the changes.
In Microsoft Word 2003, the orientation change is approximately the same: open the File tab, go to the Page Settings menu. In the "Orientation" section , check "Landscape" .
It may be useful to read:
How to be?Of course, this partly solves the problem, but creates a new one - what about the pagination, with “broken” text blocks and uneven layout?